
Flooring is one of the few building elements you interact with every single day. Getting the flooring installation right matters just as much as choosing the right material, because even premium flooring fails prematurely when it’s installed over a bad subfloor or without proper acclimation.
This guide walks through how flooring installation actually works in American residential and commercial buildings: the major flooring types, how each is installed, what proper prep looks like, typical costs in the U.S. market, and how to decide between DIY and hiring a professional.
Why Installation Quality Matters More Than the Flooring Itself
A $12-per-square-foot hardwood floor installed over an unleveled, damp subfloor will cup, gap, and squeak within a year. A modest $3-per-square-foot luxury vinyl plank installed correctly can look great for 15 years. Industry estimates consistently show that a large share of flooring failures trace back to installation errors — most commonly skipped moisture testing, inadequate subfloor preparation, and ignoring expansion gaps — rather than defects in the product itself.
That’s why manufacturers tie their warranties to installation requirements. So, if you deviate from the specified underlayment, adhesive, or acclimation period, most warranties are void. Reading the installation instructions for your specific product isn’t optional; it’s the fine print that determines whether you’re protected.
The Main Flooring Types and How They’re Installed
Solid Hardwood
Solid hardwood (oak, maple, hickory, walnut) remains the gold standard in American homes and consistently adds resale value. It’s typically installed by nail-down or staple-down over a wood subfloor, with each plank fastened at an angle through the tongue.
Key installation requirements:
- Acclimation: Planks should sit in the room for 3–5 days (sometimes longer in humid regions like the Southeast) so the wood adjusts to the home’s temperature and humidity before installation.
- Expansion gaps: A 1/2- to 3/4-inch gap around the perimeter, hidden by baseboards, allows seasonal movement.
- Subfloor: Plywood or OSB, flat to within 3/16 inch over 10 feet, with moisture content within 2–4% of the flooring itself.
Solid hardwood generally shouldn’t go below grade (basements) or directly over concrete slabs without a sleeper system, because it’s too sensitive to moisture.
Engineered Hardwood
Engineered hardwood is a real wood veneer over a plywood or HDF core, and is more dimensionally stable. This quality makes it the go-to choice over concrete slabs and in basements. It can be glued down, stapled, or floated (planks click together and rest on an underlayment without being fastened to the subfloor). Floating installation is the most DIY-friendly and is common in condos, where glue or nails may be restricted.
Luxury Vinyl Plank (LVP) and Vinyl Tile (LVT)
LVP has become the fastest-growing flooring category in the U.S., especially in rentals, basements, kitchens, and bathrooms, because it’s waterproof, durable, and affordable. Most modern LVP uses a click-lock floating system installed over a thin underlayment or with a pre-attached pad. Glue-down LVT is more common in commercial buildings, where rolling loads (carts, office chairs) demand a fully adhered floor.
Installation is forgiving but not foolproof: the subfloor still needs to be flat, because rigid-core planks will flex and separate at the joints over dips and humps.
Ceramic and Porcelain Tile
Tile is the standard for bathrooms, entryways, and much of the Sun Belt, where homes on concrete slabs make tile installation straightforward. It’s installed with thinset mortar over a properly prepared substrate — cement backer board over wood subfloors, or an uncoupling membrane (like Ditra) to prevent cracking from subfloor movement. After the mortar cures, joints are grouted and, in wet areas, sealed.
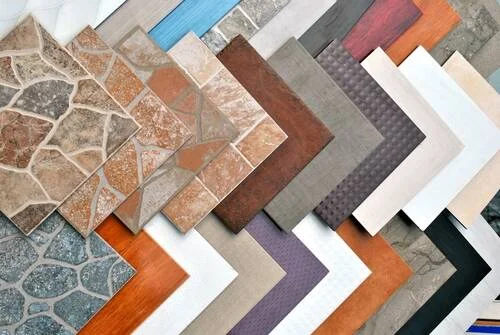
Tile is the least forgiving installation: incorrect trowel size, poor mortar coverage, or a flexing subfloor leads to cracked tiles and loose grout. Large-format tiles (12×24 inches and up), now popular in U.S. remodels, demand an even flatter substrate and back-buttering for full coverage.
Laminate
Laminate — a photographic wood layer over a fiberboard core — installs as a floating click-lock floor, very similar to LVP. It’s inexpensive and scratch-resistant, but traditional laminate is vulnerable to standing water, so newer water-resistant lines specify strict cleanup windows. It’s a strong choice for bedrooms, living rooms, and hallways on a budget.
Carpet
Wall-to-wall carpet is installed by stretch-in over padding using tack strips around the room’s perimeter, or glued down in commercial settings. Proper power-stretching is the difference between a smooth floor and wrinkles within a couple of years — one reason carpet is rarely a DIY project.
Subfloor Preparation: The Step That Decides Everything
No matter the flooring type, professional installers spend a surprising amount of time on what’s underneath. Proper prep includes:
- Moisture testing. Concrete slabs are tested with calcium chloride or relative humidity probes; wood subfloors with a moisture meter. Excess moisture is the number-one killer of flooring — it causes cupping in wood, adhesive failure in vinyl, and mold under everything.
- Flattening. High spots are ground or sanded down; low spots are filled with self-leveling compound. Most manufacturers specify flatness within 3/16 inch over 10 feet.
- Cleaning and securing. Debris is removed, squeaky subfloor panels are screwed down, and protruding fasteners are set flush.
- Underlayment. Depending on the product: foam or cork for floating floors, backer board or membranes for tile, felt or rosin paper for nail-down hardwood, and moisture barriers over concrete.
In multi-story buildings — condos and apartments especially — many HOAs also require a sound-rated underlayment meeting minimum IIC (Impact Insulation Class) ratings, so check building rules before choosing a product.
What Flooring Installation Costs in the U.S.
Costs vary by region (labor in coastal metros runs well above the national average), but typical installed price ranges per square foot, including materials and labor, look roughly like this:
| Flooring type | Typical installed cost (per sq. ft.) |
|---|---|
| Carpet | $3 – $8 |
| Laminate | $4 – $9 |
| Luxury vinyl plank | $4 – $10 |
| Engineered hardwood | $7 – $15 |
| Solid hardwood | $8 – $18+ |
| Ceramic/porcelain tile | $8 – $20+ |
Add-ons that inflate the final bill: removal and disposing of old flooring ($1–$2 per sq. ft.), subfloor repair or leveling. Also includes moving furniture, stair installation (priced per step), and trim work. Always get itemized quotes from at least three licensed contractors, and confirm they carry liability insurance. Also check requirements for contractor licensing vary by state, so verify credentials with your state’s licensing board.
DIY or Hire a Pro?
Reasonable DIY projects: click-lock LVP, laminate, and floating engineered hardwood in simple rectangular rooms. With a tapping block, pull bar, saw, and patience, a competent homeowner can handle these over a weekend and save $2–$4 per square foot in labor.
Usually worth hiring out: nail-down hardwood, tile (especially showers and large-format), carpet, herringbone or other pattern work, and any job involving significant subfloor correction. The tools, skill, and consequences of error all scale up quickly.
A good middle path: do the demolition and furniture-moving yourself, and pay a professional for the installation itself.
Common Installation Mistakes to Avoid
- Skipping acclimation for wood products, leading to gaps in winter and buckling in summer.
- Ignoring moisture testing over concrete slabs, especially in basements.
- Leaving no expansion gap on floating floors, causing peaking at the joints.
- Installing over an uneven subfloor and hoping the flooring “hides” it.
- Not staggering plank seams, which weakens the floor and looks unnatural.
- Using the wrong adhesive or trowel size for glue-down products.
Final Thoughts
Flooring installation rewards patience and preparation far more than speed. Choose a material suited to the room’s moisture level and traffic, insist on proper subfloor prep, follow the manufacturer’s instructions to protect your warranty, and be honest about whether a project fits your skill level. Done right, a floor is an investment you’ll walk on comfortably for decades — and one of the most reliable ways to boost a home’s value in the U.S. market.
Read Also-
Top 10 Civil Engineering Colleges in the USA – 2026 Edition
How to Hire a Structure Engineer in USA? (2026 Edition)
Texas Contractor Licensing: An Essential Guide for Specialty Trades
California Plumbing Contractor License: Exams, Fees & Renewal